Tire pressure is one of the most overlooked variables in cycling — and one of the most impactful. Too little air and you risk pinch flats and sluggish handling. Too much and you lose traction, comfort, and rolling efficiency.
The good news? Getting your tire pressure right takes less than two minutes and costs nothing. This guide covers everything you need to know, whether you ride road, gravel, or mountain bike.
- Why Tire Pressure Matters
- Key Factors That Affect Tire Pressure
- Recommended Tire Pressure by Bike Type
- Tire Pressure Chart
- How to Use a Bike Tire Pressure Calculator
- How to Check and Inflate Your Tires
- Tubeless vs Clincher: Does It Change the PSI?
- Common Mistakes to Avoid
- FAQ
Table of Contents
Why Tire Pressure Matters
Your tires are the only contact point between you and the road. The pressure inside them determines how that contact feels — and performs.
Here is what changes with pressure:
- Rolling resistance — Under-inflated tires deform more with each rotation, wasting energy. However, extremely high pressure on rough surfaces also increases resistance because the bike bounces instead of rolling smoothly.
- Grip and traction — Lower pressure increases the contact patch, giving you more grip in corners and on loose surfaces.
- Comfort — Tires absorb vibration. The right pressure acts as a suspension layer, especially on longer rides.
- Puncture risk — Too low and you risk pinch flats (snake bites). Too high on sharp surfaces and the tire cannot deform around obstacles, increasing the chance of a cut.
The relationship between pressure and performance is not linear. There is a sweet spot for every rider, tire, and surface — and that is exactly what this guide will help you find.
Key Factors That Affect Your Ideal Tire Pressure
There is no single correct pressure for every cyclist. Your ideal PSI depends on a combination of variables:
1. Rider Weight
The heavier the rider, the more pressure is needed to support the load. This is the single biggest factor in the equation. A 60 kg rider and a 90 kg rider on identical bikes and tires should run very different pressures.
2. Tire Width
Wider tires hold more air volume, so they can run at lower pressures while still supporting the rider’s weight. A 25mm road tire needs significantly more PSI than a 2.4-inch MTB tire.
3. Surface Type
- Smooth tarmac — Higher pressure reduces rolling resistance
- Rough tarmac or cobbles — Lower pressure absorbs vibration and maintains traction
- Gravel or dirt — Lower pressure increases grip and reduces bounce
- Mud or loose terrain — Very low pressure for maximum contact patch
4. Tube Type (Clincher vs Tubeless)
Tubeless tires can safely run 10–15% lower pressure than clinchers because there is no inner tube to pinch flat.
5. Rim Width
Wider rims support wider effective tire widths and allow slightly lower pressures. Always check the tire manufacturer’s recommended rim width range.
6. Weather and Temperature
Cold air is denser. If you inflate your tires in a warm garage and then ride in cold weather, pressure drops slightly. Hot summer roads can raise pressure in a pre-inflated tire. Check pressure before every ride.
Recommended Tire Pressure by Bike Type
Road Bike Tire Pressure
Modern road cycling has shifted away from the old “harder is faster” philosophy. Research by Silca, Zipp, and others has shown that lower pressures on real-world surfaces often result in faster times.
General road bike pressure ranges:
| Tire Width | Light Rider (55–70 kg) | Medium Rider (70–85 kg) | Heavy Rider (85–100 kg+) |
|---|---|---|---|
| 23mm | 90–100 psi | 100–110 psi | 110–120 psi |
| 25mm | 80–90 psi | 90–100 psi | 100–110 psi |
| 28mm | 70–80 psi | 80–90 psi | 90–100 psi |
| 32mm | 60–70 psi | 70–80 psi | 80–90 psi |
Tip: Front tire pressure should be 10–15% lower than rear, since the rear wheel carries more of the rider’s weight.
Gravel Bike Tire Pressure
Gravel riding demands a balance between speed on tarmac and grip on loose surfaces. Most gravel-specific tires run tubeless, which allows for lower pressures.
General gravel pressure ranges:
| Tire Width | Hard Pack / Gravel Road | Mixed Surface | Loose / Muddy |
|---|---|---|---|
| 35mm | 40–50 psi | 35–45 psi | 28–38 psi |
| 40mm | 35–45 psi | 30–40 psi | 25–35 psi |
| 45mm | 30–40 psi | 25–35 psi | 20–30 psi |
Mountain Bike Tire Pressure
MTB tire pressure is the most variable of all disciplines. The terrain, trail conditions, and riding style all play major roles.
General MTB pressure ranges:
| Tire Width | XC / Hardtail | Trail / Enduro | DH / Freeride |
|---|---|---|---|
| 2.2″ | 28–35 psi | 25–32 psi | 22–28 psi |
| 2.4″ | 24–30 psi | 22–28 psi | 18–24 psi |
| 2.6″+ | 20–26 psi | 18–24 psi | 15–20 psi |
Note: These ranges are starting points. Always test and adjust based on your feel and trail conditions.
Tire Pressure Chart: Quick Reference
Use this chart as a starting point, then fine-tune with the calculator below.
| Bike Type | Tire Width | Min PSI | Max PSI | Notes |
|---|---|---|---|---|
| Road (clincher) | 23–25mm | 85 | 120 | Higher for heavier riders |
| Road (tubeless) | 25–28mm | 70 | 100 | 10–15% lower than clincher |
| Gravel (tubeless) | 38–45mm | 25 | 50 | Adjust for surface |
| MTB (tubeless) | 2.2–2.6″ | 18 | 35 | Front lower than rear |
| Hybrid / Commuter | 35–45mm | 50 | 70 | Prioritise comfort |
| City / Cruiser | 45mm+ | 40 | 65 | Comfort-focused |
How to Use a Bike Tire Pressure Calculator
Charts give you a range — a calculator gives you a precise starting number based on your specific data.
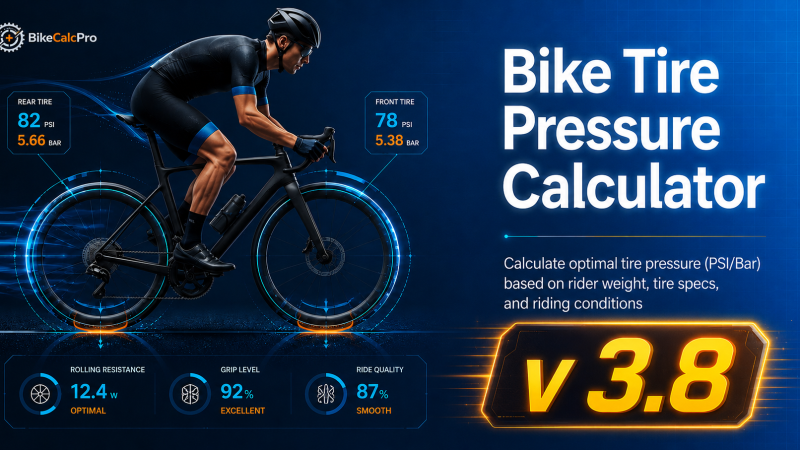
Our Tire Pressure Calculator takes into account:
- Your total weight (body + gear)
- Tire width
- Tire type (clincher, tubeless, or tubular)
- Surface type
- Rim width (optional)
The result is a recommended front and rear PSI — personalised for your setup. Start there, ride for 30 minutes, and adjust if something does not feel right.
How to get the most accurate result:
- Weigh yourself with your cycling kit and shoes on
- Add the weight of your fully loaded bike (with bags, water, etc.)
- Enter your actual mounted tire width — this can differ from the labelled width depending on your rim
How to Check and Inflate Your Tires
What You Need
- A quality floor pump with a built-in pressure gauge (far more accurate than mini pumps)
- Knowledge of your valve type: Presta (narrow, with a lock nut) or Schrader (wider, like a car valve)
Step-by-Step
- Remove the valve cap and, if Presta, unscrew the lock nut counter-clockwise 2–3 turns
- Attach the pump head firmly onto the valve — you should feel it seat properly
- Check the current pressure on the gauge before adding air
- Pump to your target PSI, watching the gauge
- Remove the pump head quickly and cleanly to minimise air loss
- Tighten the lock nut (Presta) and replace the valve cap
- Repeat for the other tire, using the front/rear split recommendation
How Often Should You Check?
- Road tires — before every ride. High-pressure tires lose 5–10 psi overnight through natural permeation
- MTB and gravel tires — at least every 2–3 rides
- Tubeless setups — weekly, as sealant can affect pressure over time
Tubeless vs Clincher: Does It Change the Recommended PSI?
Yes — significantly.
With a clincher setup (tube inside), you need enough pressure to prevent the tube from getting pinched between the tire and rim when you hit a bump. This sets a practical lower limit on PSI.
With tubeless, there is no tube to pinch, so you can run lower pressures safely. The benefits are:
- More grip — larger contact patch
- Better comfort — the tire absorbs more road chatter
- Self-sealing — sealant plugs small punctures automatically
- Lower rolling resistance — on real-world surfaces, lower-pressure tubeless often outperforms higher-pressure clinchers
As a rule of thumb, subtract 10–15% from your clincher pressure when switching to tubeless on the same tire width.
Common Tire Pressure Mistakes to Avoid
Mistake 1: Using the Maximum Pressure Printed on the Tire
The sidewall number is the maximum safe pressure — not the recommended riding pressure. Riding at max PSI is almost always too hard and will reduce performance and comfort.
Mistake 2: Never Adjusting for Conditions
Many riders find one pressure and never change it. Dropping 5–10 psi for a wet or loose surface takes 30 seconds and makes a real difference to safety and control.
Mistake 3: Ignoring the Front/Rear Split
The rear wheel typically bears 60% of the combined rider and bike weight. Running equal pressure front and rear usually means the front is over-inflated relative to its load.
Mistake 4: Checking Pressure by Feel
Squeezing a tire with your thumb is not reliable, especially at road bike pressures. A pump with a gauge is the only accurate method.
Mistake 5: Forgetting to Account for Rider Weight
Generic charts are a starting point, not the answer. A 65 kg rider and a 95 kg rider on the same bike need different pressures — sometimes 20–30 psi apart.
FAQ
What PSI should my bike tires be?
It depends on your weight, tire width, and surface. As a general guide: road bikes typically run 80–110 psi, gravel bikes 30–50 psi, and MTBs 20–35 psi. Use our Tire Pressure Calculator to get a personalised recommendation.
Should front and rear tire pressure be the same?
No. The rear tire carries more weight (around 60% of the total load), so it should be inflated 5–10% higher than the front. Running equal pressure usually means the front is over-inflated.
Can I ride with low tire pressure?
Occasionally riding slightly low is not dangerous, but consistently under-inflated tires increase rolling resistance, wear the tire sidewalls faster, and raise the risk of pinch flats on road bikes. For MTB, intentionally lower pressures are normal and beneficial for grip.
How do I know if my tire is tubeless?
Check the tire sidewall for “Tubeless Ready” or “TLR” markings. Your rim will also have a tubeless-compatible label. If you are unsure, check the manufacturer’s website for your specific wheel model.
Does temperature affect tire pressure?
Yes. Pressure drops roughly 1 psi for every 5°C decrease in temperature. If you inflate tires indoors in winter and then ride in cold weather, expect a small pressure drop. Always check pressure in the conditions you will be riding in.
How often should I replace my tires?
Road tires typically last 3,000–5,000 km. Gravel and MTB tires vary widely depending on terrain. Check the tread depth regularly and replace when the center tread is worn smooth or if you see casing threads showing through.
Summary
Getting your tire pressure right is one of the easiest and most effective performance upgrades you can make — for free. The key takeaways:
- Rider weight and tire width are the two most important variables
- Use the front/rear split (rear 5–10% higher)
- Tubeless setups can run 10–15% lower than clinchers
- Check pressure before every road ride; every 2–3 rides for MTB
- Start with a calculated recommendation, then fine-tune by feel
Ready to find your exact numbers? Use our Bike Tire Pressure Calculator →